Importing a custom asset in Battle Map Studio is a quick and simple process.
Import an Asset
To import a custom asset bundle in Battle Map Studio, first, navigate to the Asset Manager window.
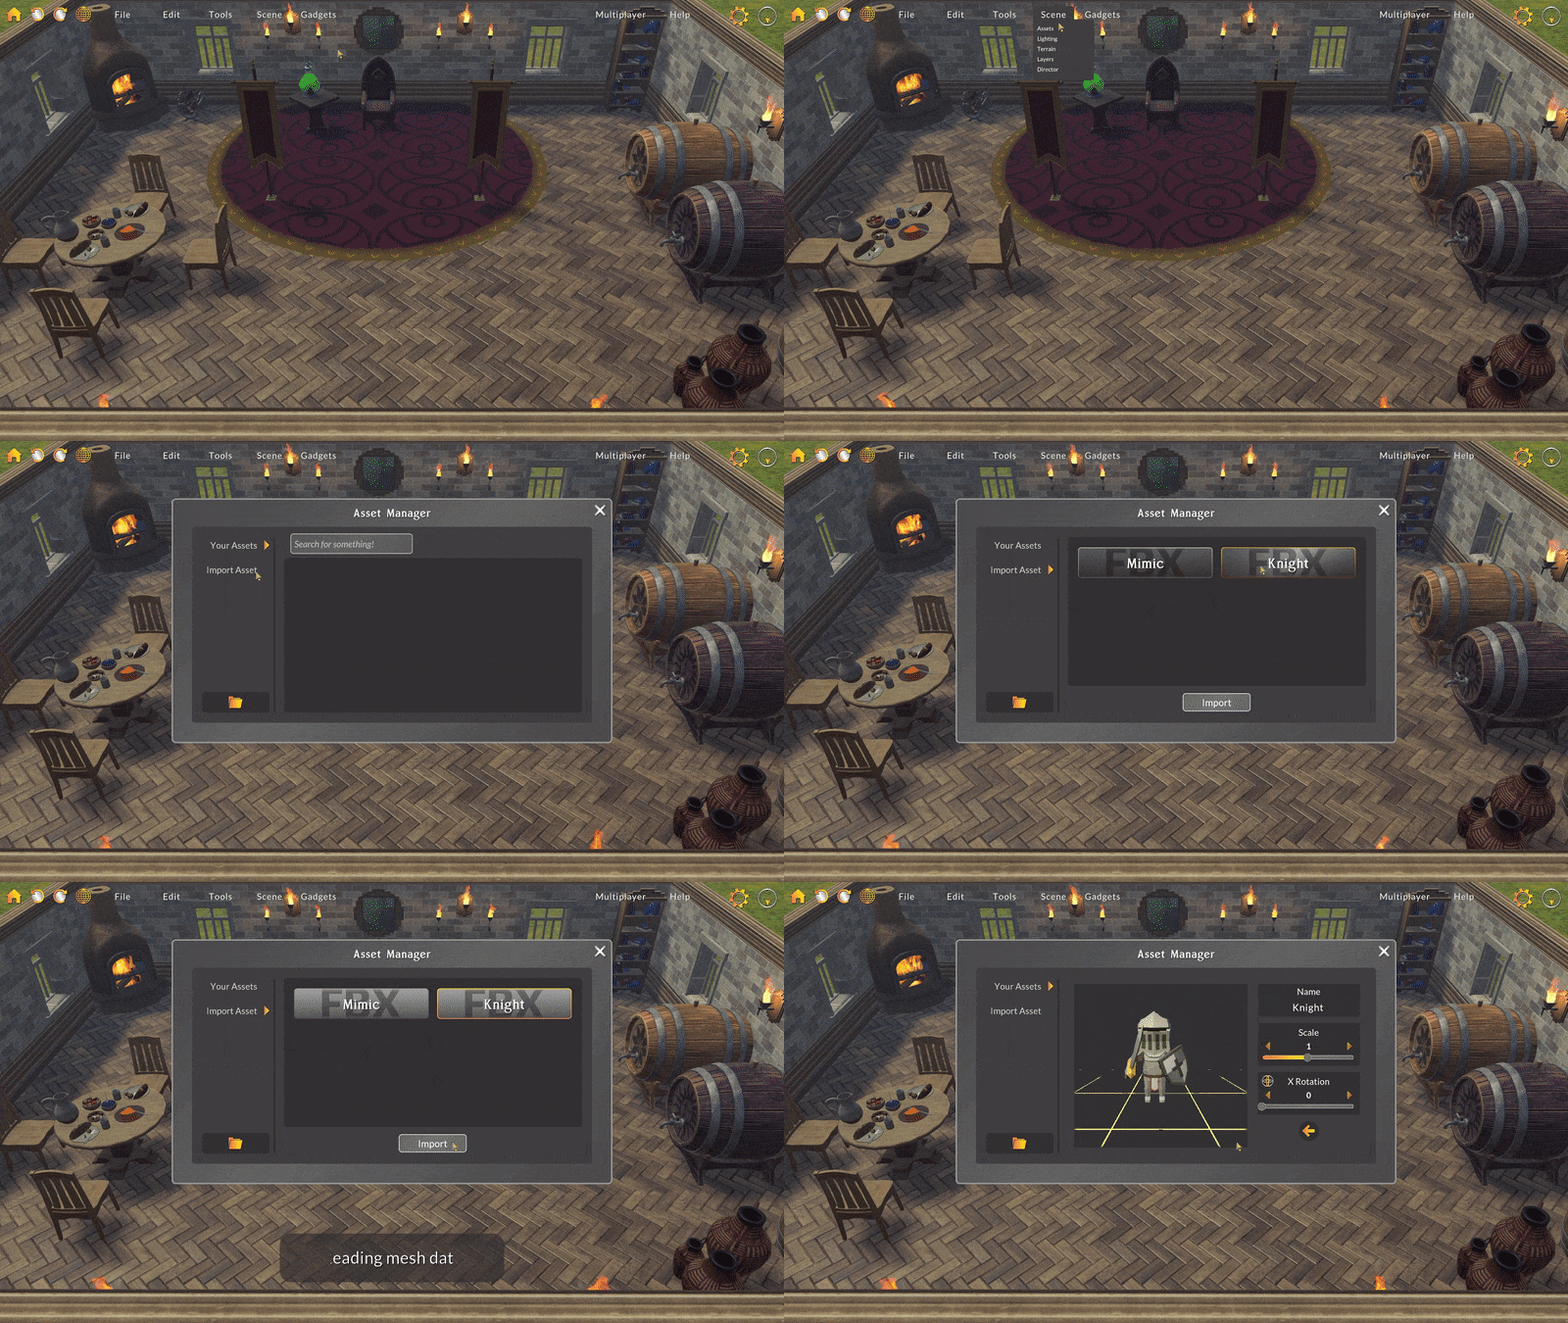
Select the Import Asset button to open the Asset Import window, which displays local importable files (put any models you wish to import in the BMS_Data/Assets folder, which can be found where Battle Map Studio is installed).
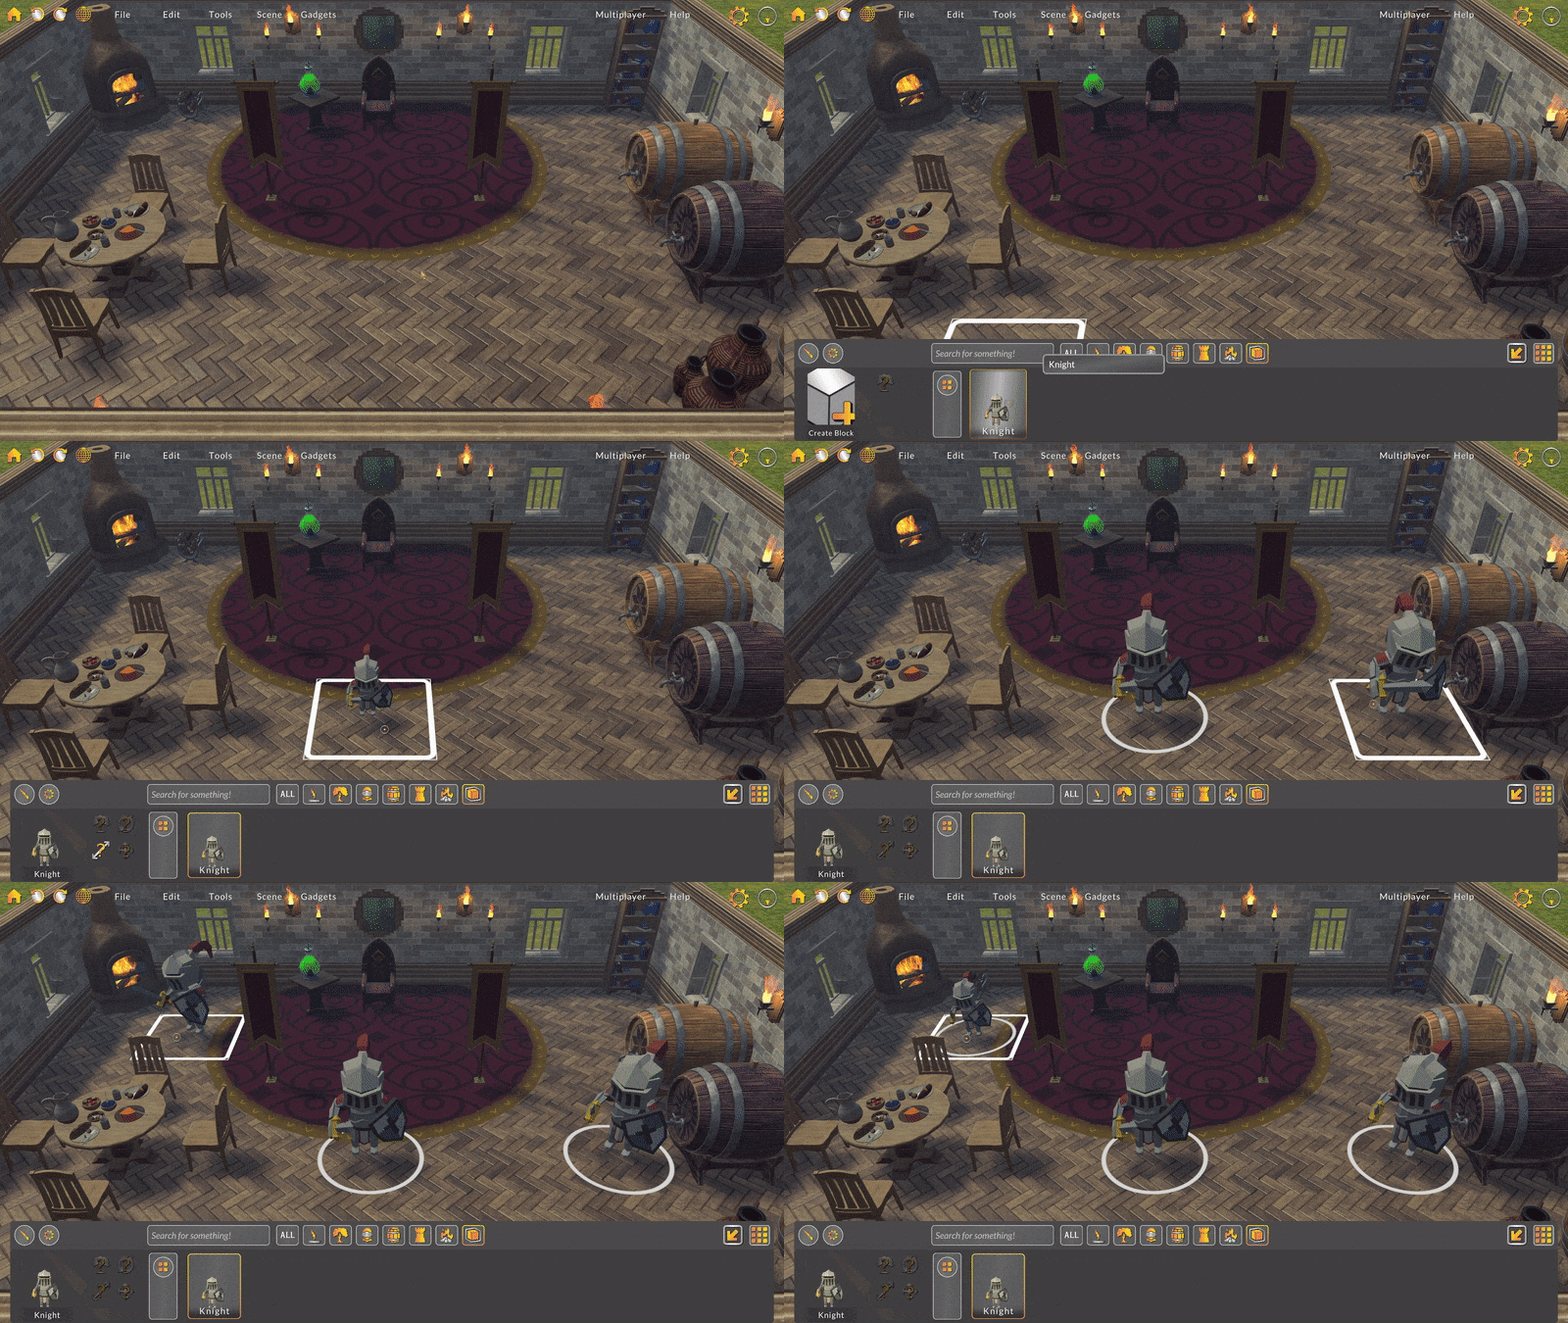
Once an asset is imported into the palette, you can place it onto your environment just like any other prop or character.
Import Settings
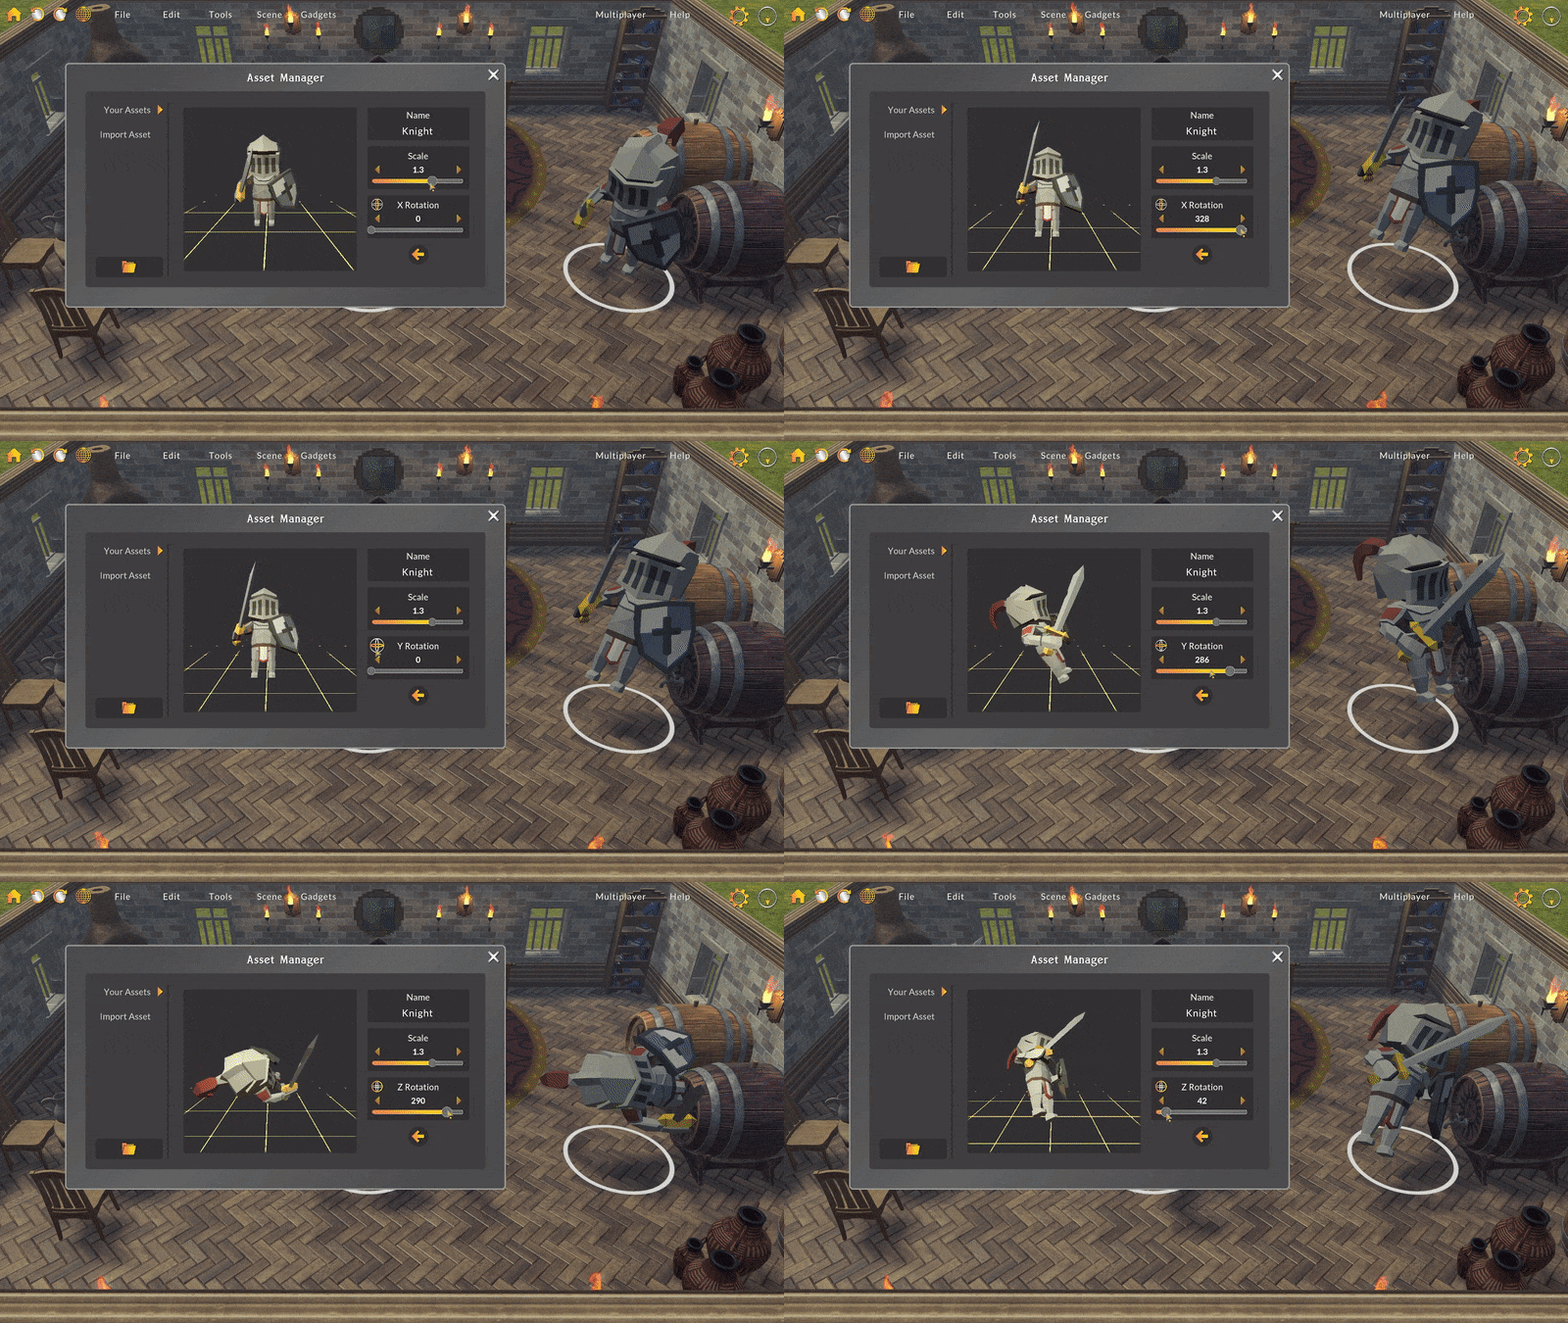
Sometimes a model might import with a strange rotation or scale. Don’t worry, this is common! Custom assets have additional properties that you can edit, like import name, rotation, and scale.
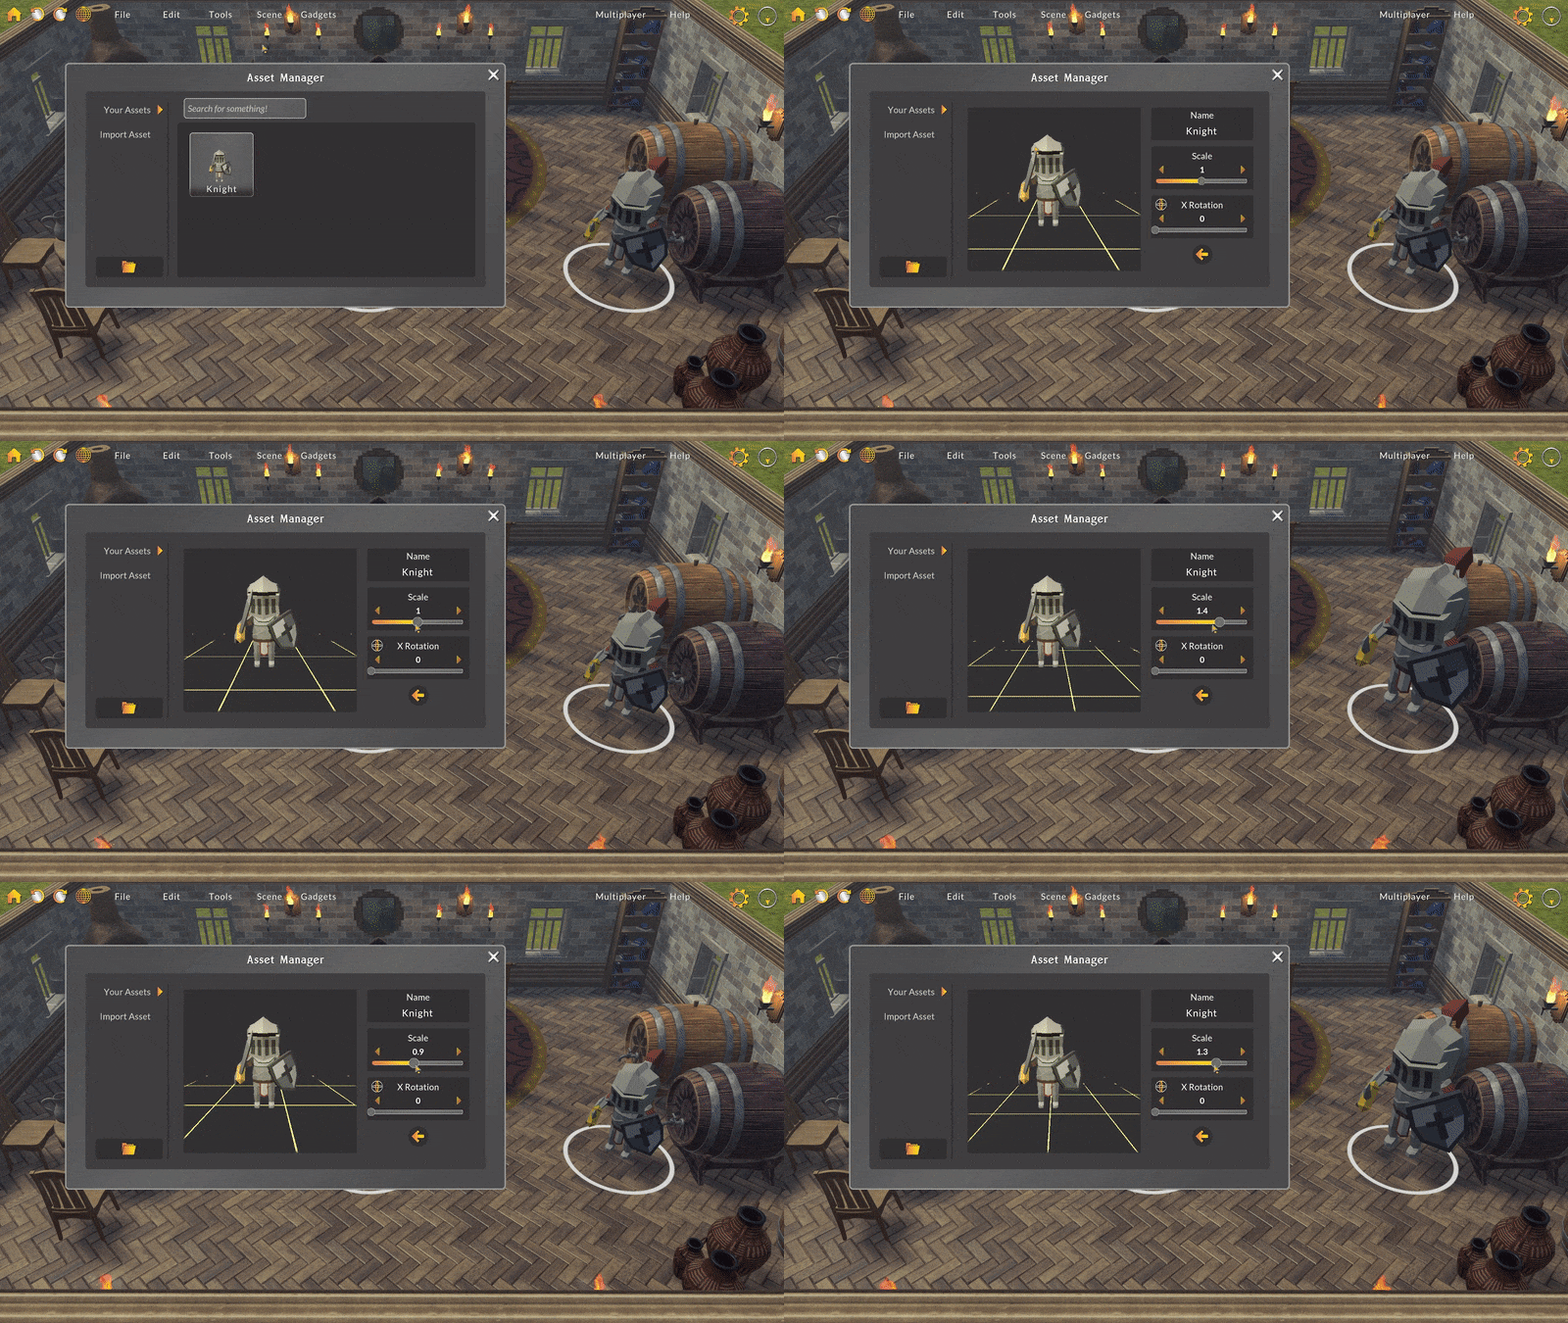
To edit an assets import settings, select the asset in the Asset Manager window. Here you can change the asset’s name, import rotation, and import scale.
Useful Considerations
Since an asset’s rotation and scale are base values, rotating or scaling an asset in the import settings window will change all placed props/characters using that asset.
Keep in mind that assets are scaled to fit on import and are currently meant to be used as individual placeable props. For example, right now a treasure chest model would work great, but a full-scale city model wouldn’t.
Delete an Asset
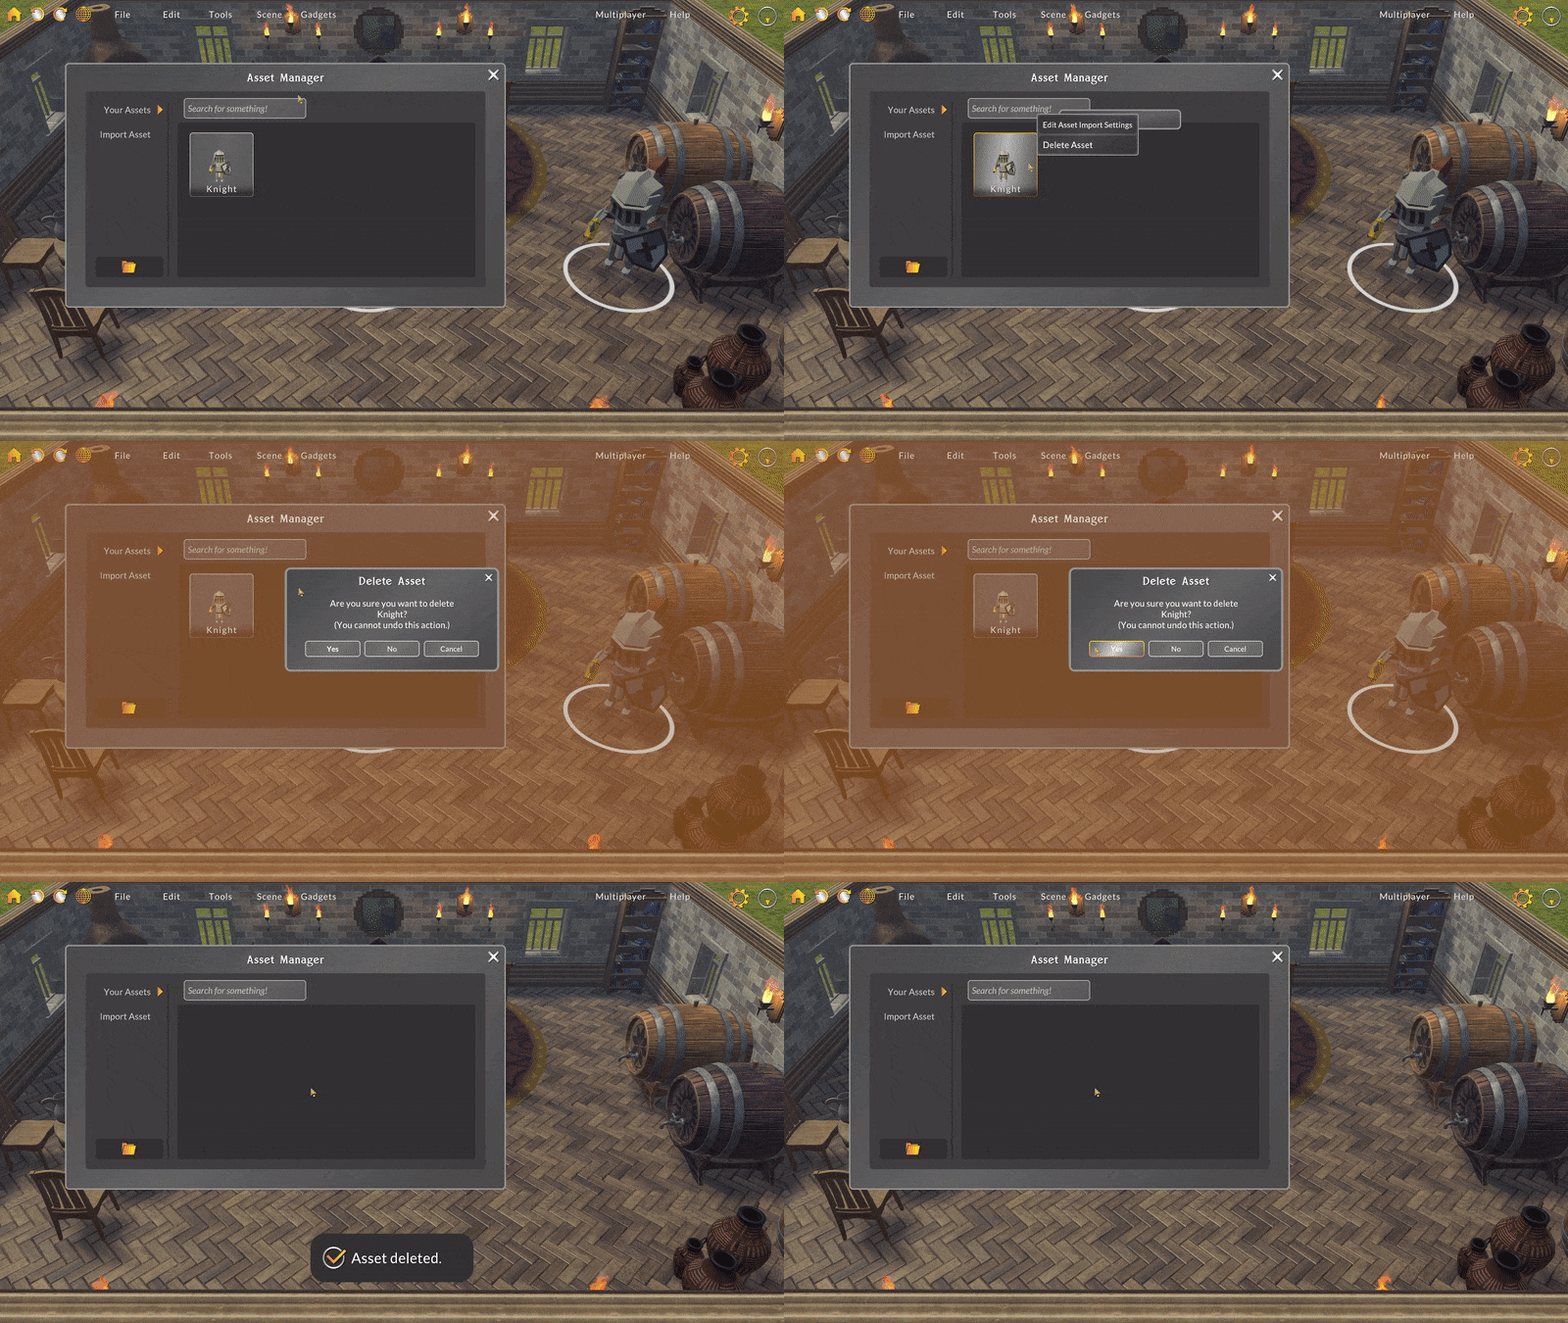
Custom assets can be deleted by right-clicking the asset and selecting Delete. Deleting an asset removes all placed props using that asset and then removes the asset from the palette. Be careful deleting assets because you can’t undo asset deletion!
Supported file types:
Battle Map Studio Asset (.bmsasset)
3D
FBX
OBJ
STL
GLTF2
3MF
ZIP
Unity Asset Bundle (.unity3d)
2D
PNG
JPG